
Building a PC from scratch is the only sure-fire way to ensure that your system is capable of satisfying all of your personal preferences. When you determine everything that goes into your PC from the power supply up, you know that you’ll be able to play the games, and design a art etc. you want at the frame rates you want. In addition, a home-built PC keeps the door open for upgrades — as technology changes, as your gaming tastes and needs change, or as your budget allows.
# Step 1: PC Build Tools
- Workspace. You will need a large surface to work on, such as a table. To prevent an accidental electrostatic discharge (which can damage sensitive components), make sure you stand on an uncarpeted surface.
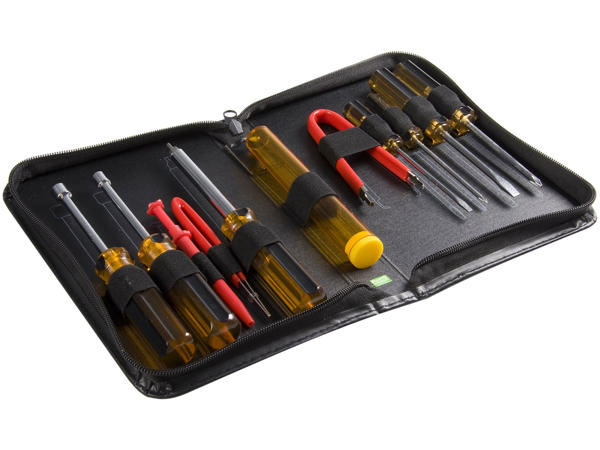
- Screwdrivers. You will need a Phillips #2 screwdriver for just about everything. If you’re installing an M.2 device, you’ll also need a Phillips #0 screwdriver.
Pro-tip: Magnetic screwdrivers will prevent you from dropping screws inside your case (the magnetic tip is very weak and shouldn’t have any effect on your components). - USB flash drive. You will need an 8GB flash drive, or larger, to store the installer for the operating system you will use.
# Step 2: PC Cases
Before you start picking out components, you should have a case — or, at least, a case size — in mind.
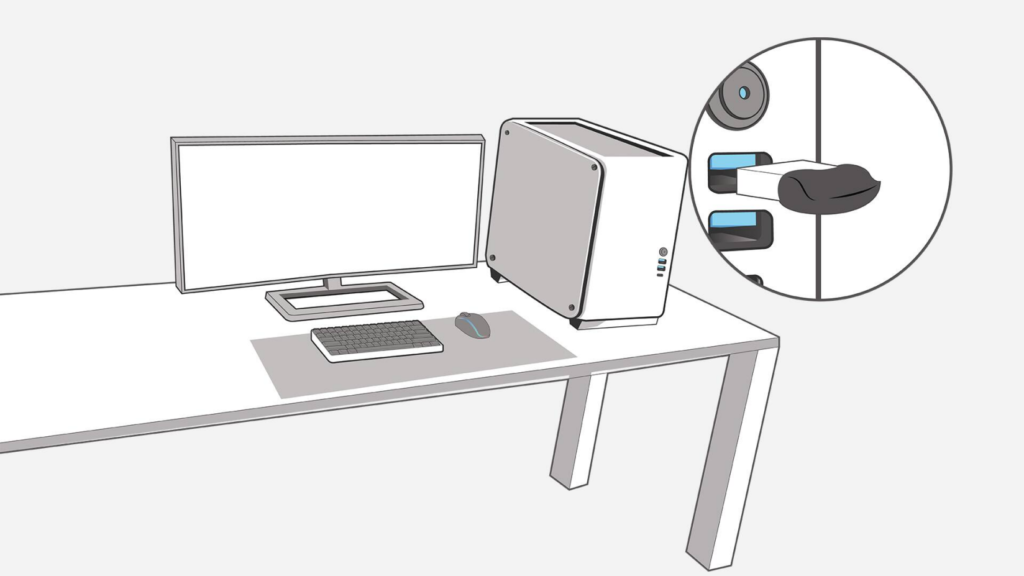
The main thing to keep in mind when picking a case is where you’re going to put the computer.
Your PC’s final location will dictate how big you can (or cannot) go, and it will also help determine whether various premium case features are worth splurging on. You probably don’t want to pay for a tempered glass side panel if the computer will be hidden under your desk, for example.
Cases typically come in three sizes: Full-tower, mid-tower, and mini-tower. These are very general categories (case sizes are not standardized among manufacturers), but they’re based on motherboard size.

# Step 3: PC Parts
This step can be as hands-on or as hands-off as you like; you can thoroughly research each individual component on your own and create a custom build from scratch, or you can find a pre-made build online and adjust it to suit your specific budget and needs. Here are a few things to keep in mind as you get started:
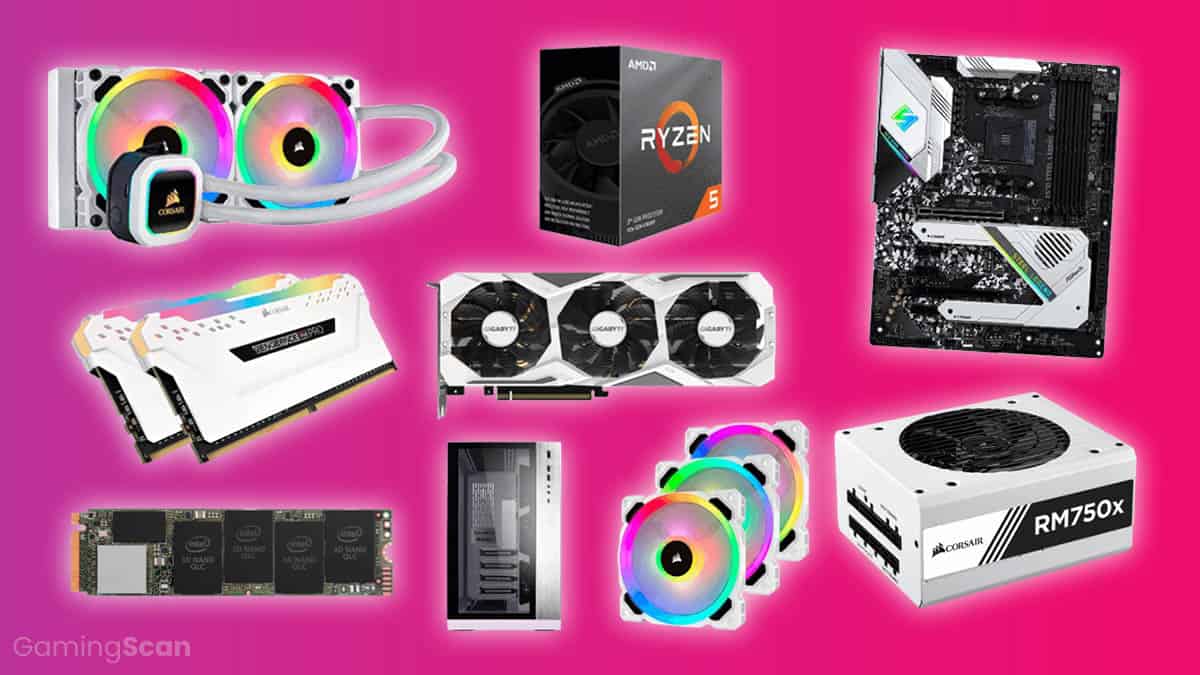
In addition to your case, here are the components you need to build a gaming PC:
- Central processing unit (CPU)
- Graphics processing unit (GPU)
- Motherboard
- Memory (RAM)
- Storage
- Power supply unit (PSU)
- System cooling
- Operating system (OS)
Let’s take a look at what each component does, why it’s necessary, and what you need to look for while shopping around.

# Install CPU
Parts/tools: Motherboard, CPU
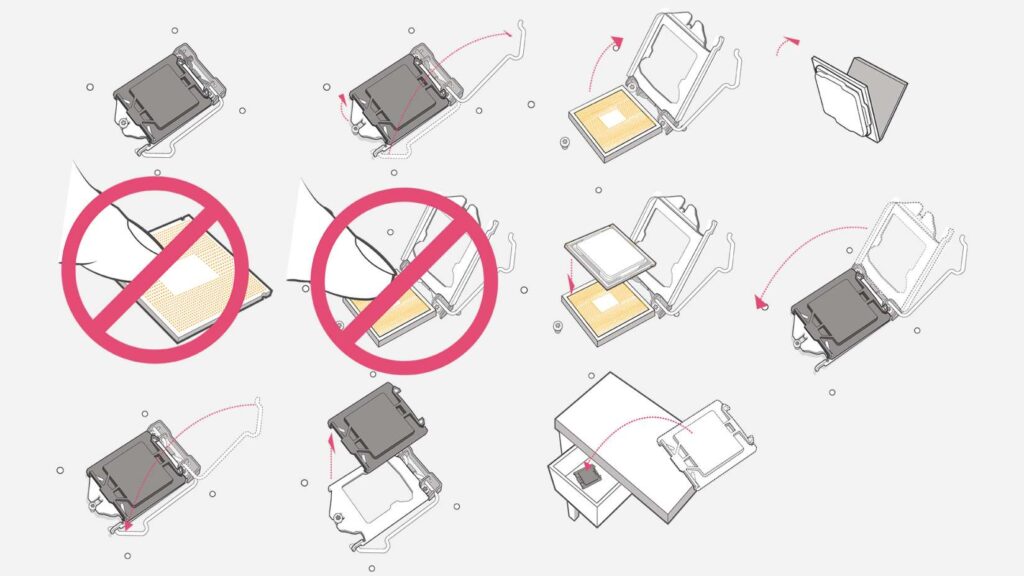
Take the motherboard out of its antistatic packaging and put it on your work surface. Find the CPU socket, which will be covered with a protective plastic cap. In one corner of the plastic cap, or more commonly, on the socket itself, you’ll see a small arrow — take note of where this arrow is.
Next to the CPU socket, you’ll see a small metal lever. Press down on the lever and pull it gently to the side (away from the socket) to open the socket tray.
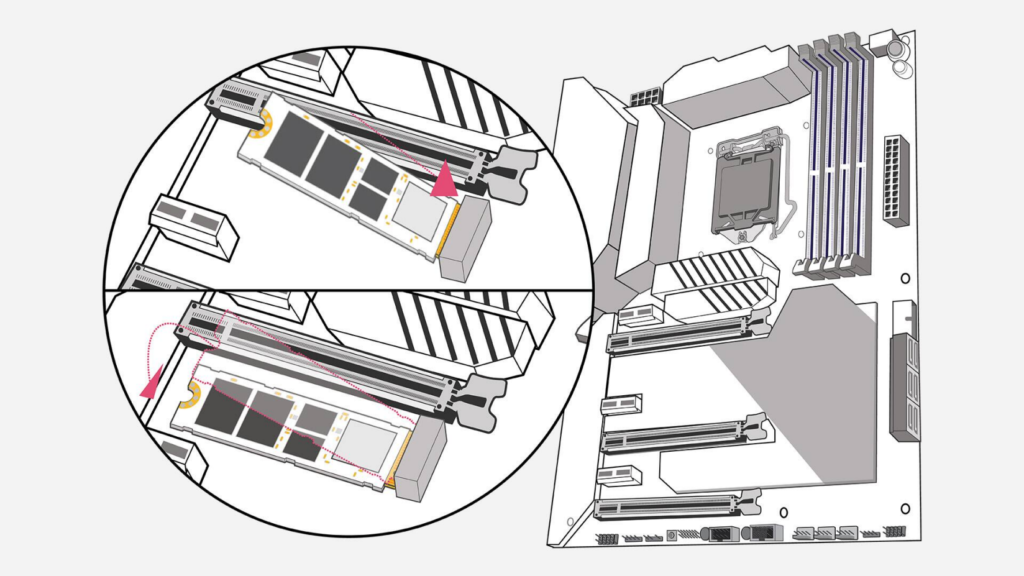
# Install M.2 SSDs (optional)
If you want to install an M.2 SSD, now is a good time to do so. First, find the M.2 slot on your motherboard. It’s a small, horizontal slot with a tiny screw across from it. If you can’t find it, if you find multiple M.2 slots, or if you are planning on installing more than one M.2 SSD, consult the user manual that came with your motherboard.
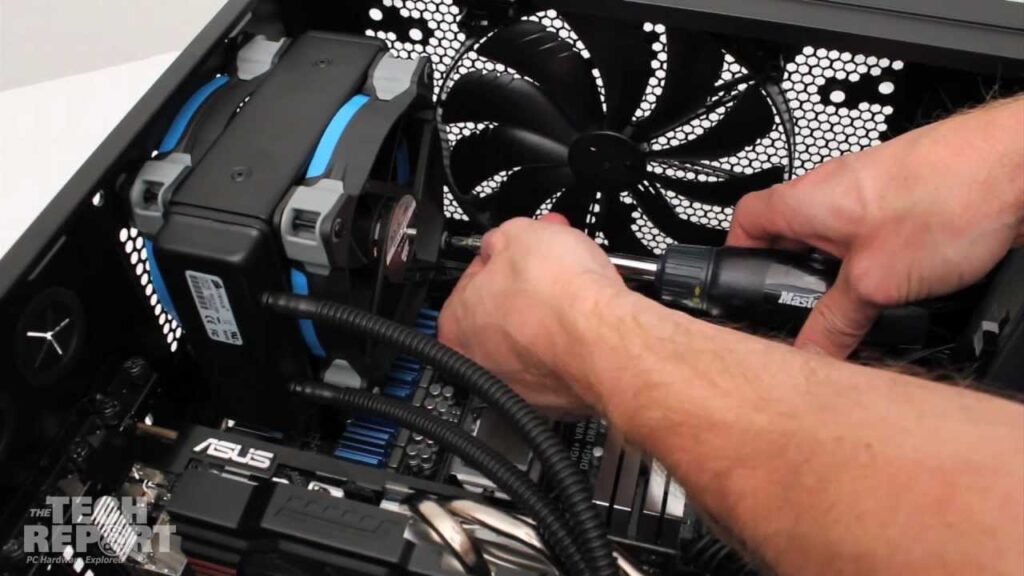
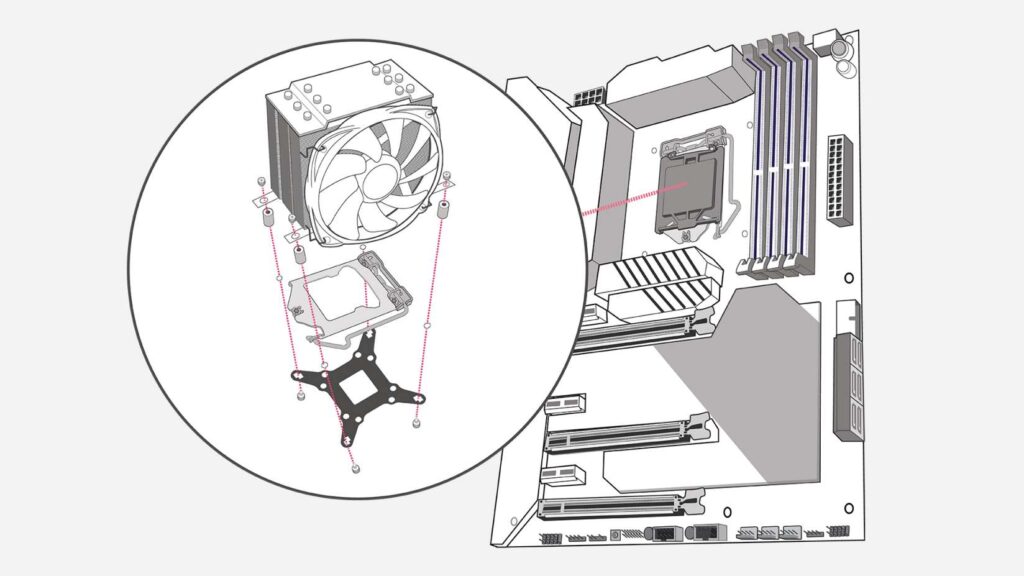
# Install CPU cooling
Parts/tools: Motherboard with installed CPU, CPU cooler, thermal paste, CPU cooler manual
There are different types of CPU coolers. For exact installation instructions, we recommend you consult the manual that came with your CPU cooler.
# Install memory (RAM)
Parts/tools: Motherboard, RAM, motherboard user manual
Determine how many RAM slots your motherboard has (most have either two or four). If you’re going to fill all available RAM slots, simply snap the RAM into place. If you’re not going to fill all of the RAM slots, consult the user manual to find the correct configuration and populate the RAM slots accordingly.

# (Optional) Do a test run outside the case
Motherboard with CPU and CPU cooler installed, RAM, GPU, PSU, screwdriver, motherboard user manual, PC monitor (attached to GPU)
Now that you’ve installed the CPU and the CPU cooler, you may want to perform a quick test run of your components just to make sure they all work. This test is much more difficult to perform (and troubleshoot) once everything is installed in the chassis. To do this, install GPU and connect everything to the power supply (if you don’t know how to install the GPU, see section below). Make sure the power supply is connected to the motherboard (both CPU 8pin and 24pin) and GPU, then plug it in and turn it on.

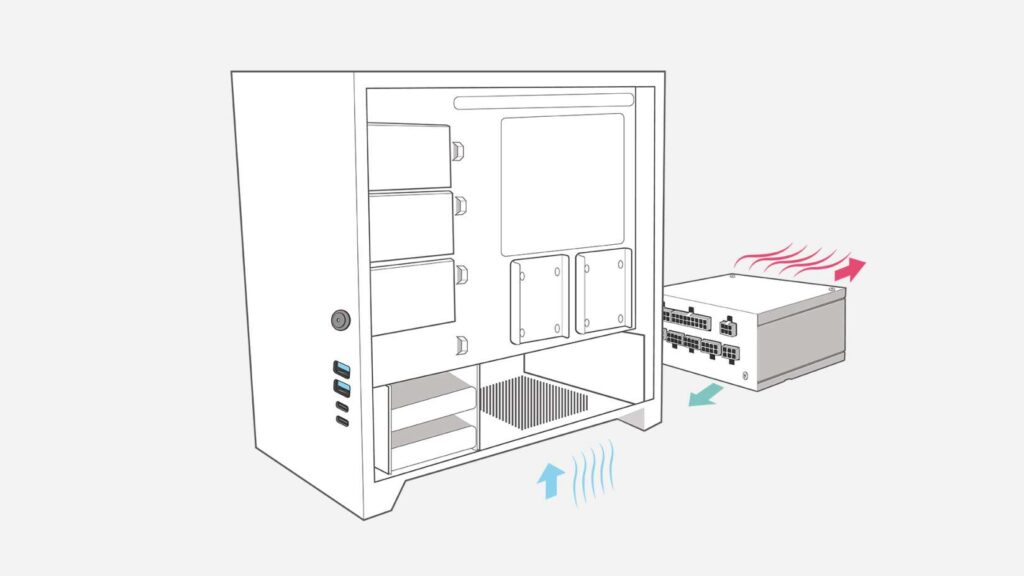
# Mount the power supply
Unpack the PSU (or unplug it from the components if you opted for a test run) and set its cables aside (if it’s a full or semi-modular unit).
Take a look at your case and figure out where the PSU is supposed to go (probably on the bottom, near the back) and how it can be oriented. Ideally, you want to orient the PSU so that its fan faces outside the case (via a vent). If your case has a vent on the bottom, you can mount the PSU upside down, so long as the bottom vent will receive decent airflow when the PC is finished.
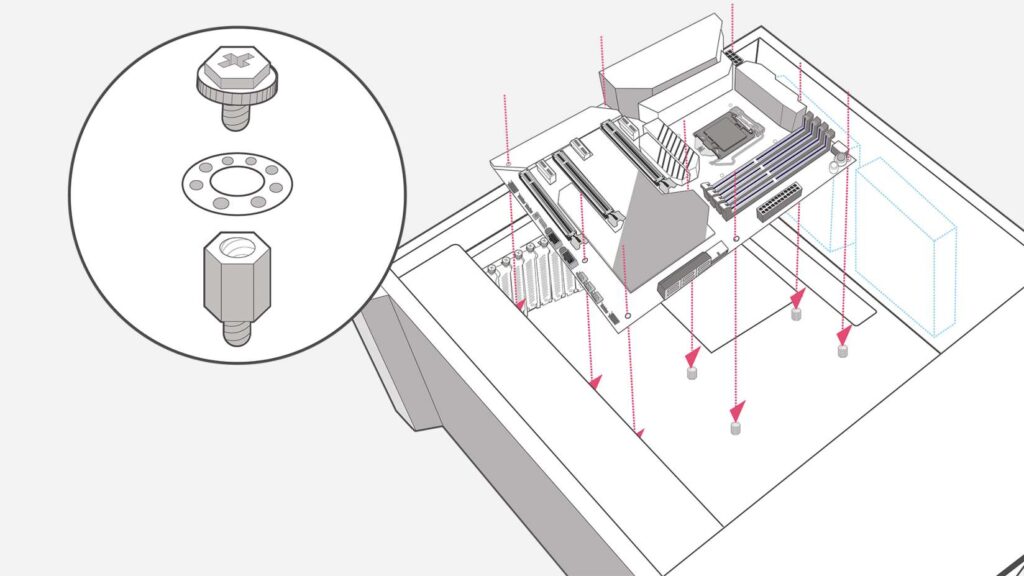
# Install motherboard
If your motherboard came with an unattached I/O shield — a rectangular sheet of metal with cutouts for the motherboard’s ports — you should first snap it into place in the back of your case (make sure it’s oriented correctly). I/O shields usually have sharp edges, so watch your fingers.
Once the I/O shield is in place, you can install the motherboard. Double-check to make sure your cables are all threaded through to the correct place, and then place the motherboard (align it with the I/O shield, first). Using a Phillips #2 screwdriver, mount the first screw — the center screw — to hold the motherboard in place. Make sure you do not drag your motherboard across the standoffs attached to the chassis.
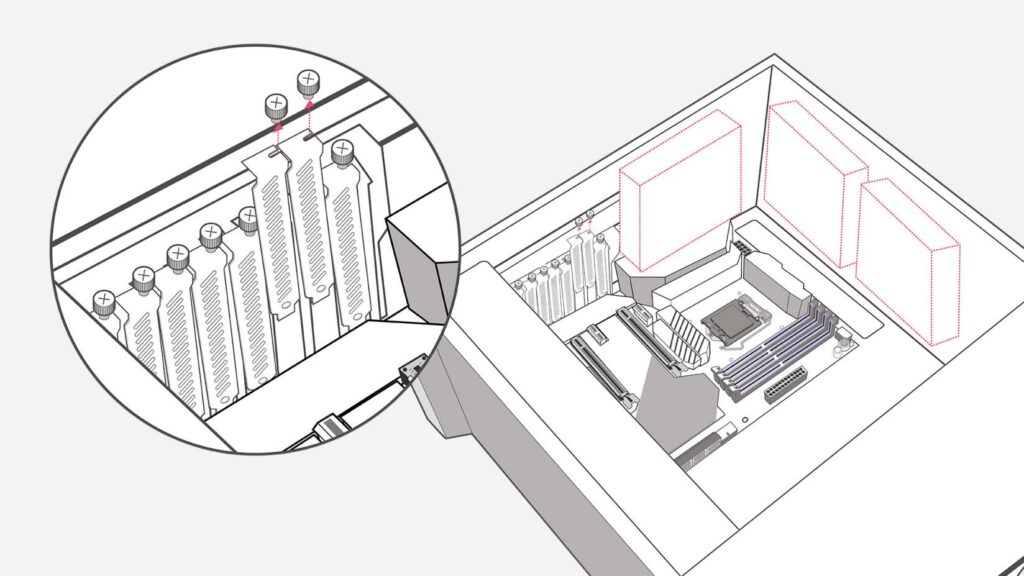
# Install GPU
Find the PCIe x16 slot on your motherboard. It will be the longest PCIe slot and may be a different color than the others. If your motherboard has more than one PCIe x16 slot, check the user manual to see if one slot needs to be prioritized. If any slot can be used, determine which slot you’ll be using based on where other components are placed — you want your GPU to have some breathing room.
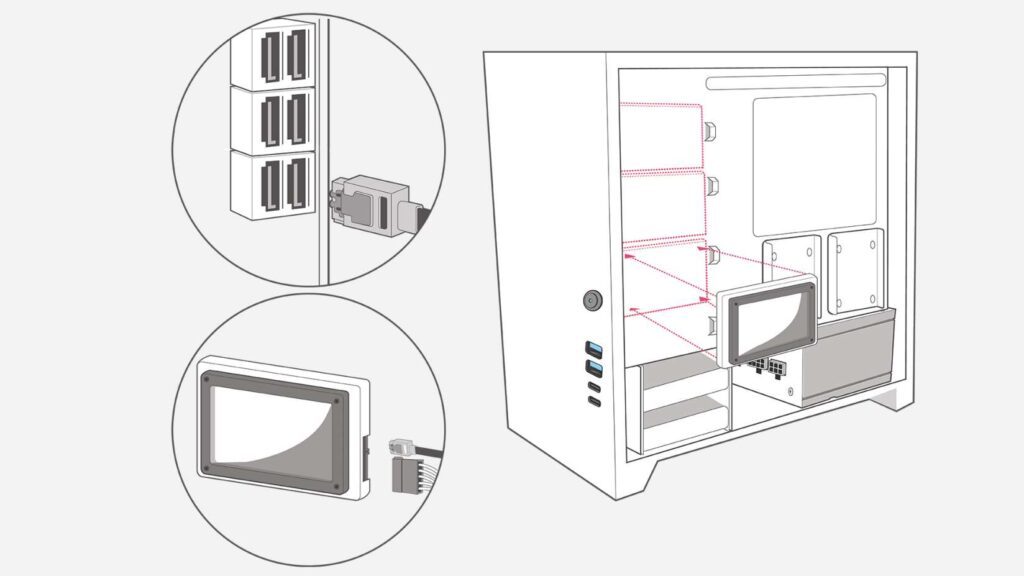
# Install storage
You should be able to find a stack of bays in different sizes somewhere inside your case. They may have little plastic switches, in which case they are tool-free bays, or they may just look like metal brackets.
Storage generally comes in two sizes, 2.5-inch (HDDs and SSDs) and 3.5-inch (HDDs). Most 3.5-inch bays can accept 2.5-inch drives, but not vice versa (some 3.5-inch bays will have trays that aren’t designed for 2.5-inch drives, but they can still fit 2.5-inch bays). You may also see larger bays in your case — these are for larger drives such as optical drives and are usually located in the front of the case, near the top.
# Install operating system
If you haven’t already prepared your operating system (OS) on a USB flash drive, now is the time to do so. (See the above section on operating systems under “PREP 3: Select your components” for more details.)
Plug in the USB flash drive that contains your OS, as well as a monitor, mouse, and keyboard, and turn on your PC.
The first screen you see will tell you to press a key to enter the system setup or BIOS. Press the key to open BIOS. (If the screen flashes off too quickly for you to see the key, consult your motherboard’s user manual.)
First, you’ll want to check to make sure your components are all installed and being recognized. Find the page in BIOS that shows your PC’s system info (different motherboards have different BIOS setups, but you should be able to find a screen that gives you this information) and check to make sure the system is recognizing everything you’ve installed so far.
Next, poke around BIOS until you find the Boot page (may be called “Boot Order” or “Boot Priority”). Change the boot order so that your USB flash drive is first and the drive you want to install your OS on (if you’re using an SSD as a boot drive, you will want to install the OS here) is second.
Restart your computer. Your computer will boot from the USB and the OS installer will pop up. Follow the instructions to finish the installation.
So if you’ve ever found yourself asking questions like any of the following…
What do I need to know to build my own computer?
What’s involved in assembling a computer from scratch?
Am I going to be getting in over my head?
Is it risky to build your own computer? Is it possible to accidentally break parts?
How do I build a fully customized computer from parts?
… then we think our step-by-step may help you get a quick overview of the entire PC build process!
IF YOU LIKE THE POST THEN FOLLOW US :
Email us on:
hubdigisolution@gmail.com
contact us on:
Landline no:+911353558143
Mobile no:
+919808724448
Facebook id:
Linkedin id:
Website:
For these type knowledge contact us :

Digi Hub Solution
Digital Service Provider